The final step for our photo montages was to add layers of information, to compliment an idea or theme in the image. We were required to submit a day and night image, both interior and exterior. It was clear to me that I would use my first night image, at sunrise, however I started anew with my daytime interior.
 |
| Final night shot |
The light orbs and moon were initially sketches on tracing paper laid over the original image. This was then scanned into the computer, and using a tablet I redrew the lines as a new layer. The light was used with the brush set at a lower opacity and applied both underneath and over the lines of the orbs. The gradient of the towers was also applied by hand in a similar fashion.
After setting the contrast at a higher level to exaggerate the red of the sky and make it seem less natural, the starts were added using a specific brush at different sizes.
The issue of the dark ground still remained, because if the towers were lighter than the ground it looked unnatural and too separate, however if they were made the same darkness they would be lost. I settled for the former, as I knew that once printed it would be darker and would look a little less defined.
The left silhouette was the most entertaining to add to the image. After positioning the man over the image, I began erasing him with the eraser on a very low opacity. I knew that the parts closest to the wall would be the darkest, so I erased from the inside to the outer edges so that the arm in particular stood out and the hand (touching the wall) was the darkest. Note that the feet are left dark as they aren't seen behind the screen.
 |
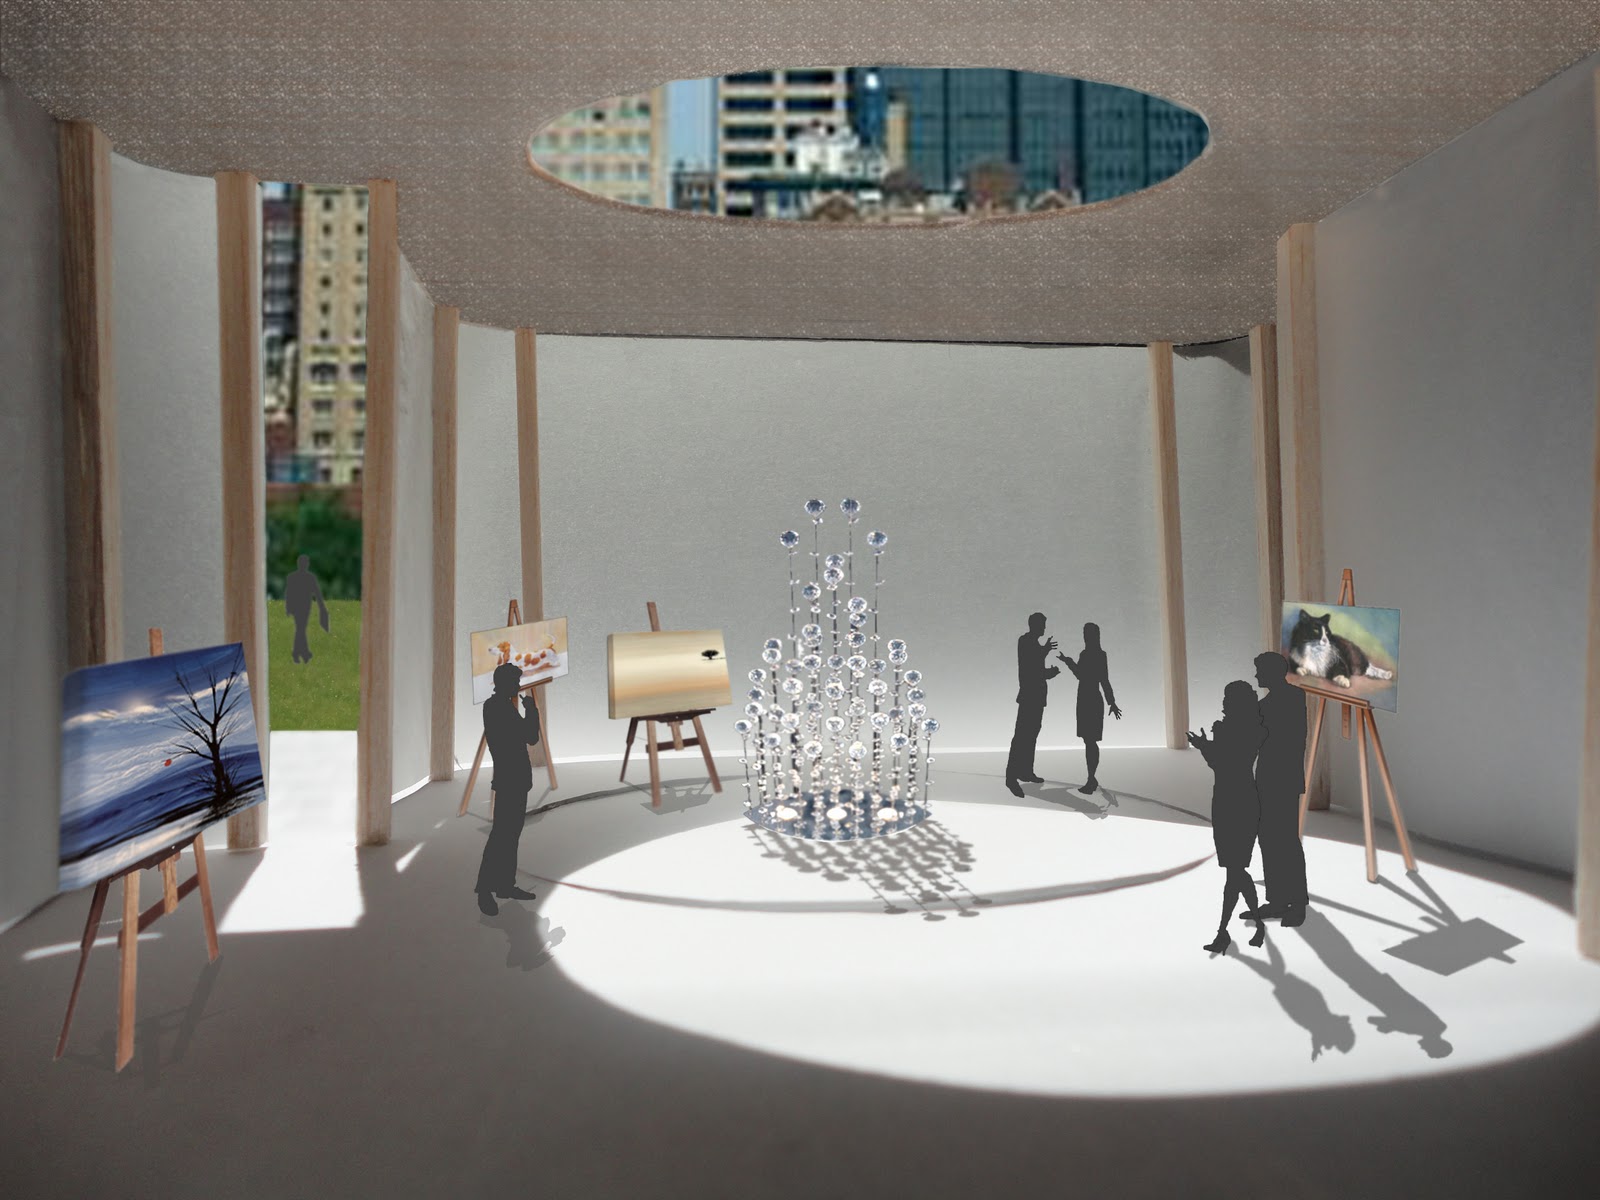
| Original model photograph |
 |
| Final daytime montage |
Seeing as the building was rather large and I wanted it to function as a public space, I decided to use it as a gallery or function centre in my daytime image.
The horizon of the cityscape in the background was aligned with the images horizon and then I skewed the top of the skyscrapers slightly to appear further away as they would in real life. A lot of the images, in particular the canvases and easels had to be skewed as well.
Seeing as I removed the mirror dome and jelly cup from this image, I decided to use a chandelier as the main light as it would reflect its own light off the many crystal baubles.
The ceiling cavity had to be adjusted as the size of the opening seemed unrealistic. The shadows were creating by replicating the object, setting it to the right angle and orientation, then turning down its opacity so that it aquired the texture of the floor. I also noted that when no in direct light, the shadows would be lighter and not as elongated.
Both of my montages I tried to make as real as possible, even with the first 'out of this world' one. They show how with a base model you can transform it into almost anything through montaging.
No comments:
Post a Comment