Wednesday 27 July 2011

Model-It! Week 2 Class Exercise

Building from a shape

This weeks task was to explore how one shape can be transformed into a myriad of spaces. The shape given to us was the elevation of my first model below, and we were to use this shape to create 3 different models.


Our base shape


For my first model (picture above), instead of building just a box or house, I tried to make one elevation bigger than the other, so that the model would expand in a pyramid-like manner.
Even in doing so, I was still disappointed in my un-inspired model, as there was little creativity in it, and was just one solid. 


Final model 1, and inspiration for model 2
The cut-out of one of the elevations inspired me to explore negative space, the opposite of my first model. Using the cut out as a template, I decided to make a model that would reveal this shape only at certain angles. I didn't want the shape to be the centre of attention, so I added small features and extensions to give the model itself a purpose, rather than just the shape it was drawn from. The result is the following:


The angle at which the base
shape can be seen
Presentation shot of my second model


For my final model, I took the idea of thinking outside the shape even further. Using it only as a base, I didn't want it to be seen at all, unless the viewer knew it was there. After scoring the shape onto a flat piece of balsa, I extended the lines, and scored more lines to integrate it into a series of lines and patterns. I cut out 'mosaic' shapes that would fill in only the original shape, and stood them up various ways so that the original shape would only appear if you folded down the protruding shapes onto the flat piece.

Building up the pieces for my final model

I was very happy with the final result, as I felt I had made some progress to avoid uncreative and flat models. I found this task one of the most challenging so far for that reason alone- as it's very hard to materialise something amazing when you have so many options open to you.

Shadow effects on my final model
Detail of the scoring

Monday 25 July 2011

Model-It! Week 1 Take-Home

Barcelona Pavillion 1:200


Our first take home task was to model Mies van der Rohe's Barcelona Pavillion in scale 1:200. 
Upon researching, I decided to focus my model on the building's precisoin and linearity. Despite the great effort taken in the choice of marble for the real building, I felt the quality itself of balsa was special in itself. 


View of the main building and central pool
Overview of the Pavillion


The main challenge I faced when undertaking this model was how to represent the site and it's inconsistency.  To do this, I tried to have the side of the base show the elevation of each orientation, however when it came to joining these elevations in the middle, it didn't match the real landscape. The building itself I found challenging enough to enjoy and allowed me to explore how I wish to represent reality in the form of a model. The following clip overviews my process:


Due to the different landscape, I needed to customise the height of the walls to accommodate for the difference between the plans and built base. Using the floor as my level plane, I built the wall heights around it. The floorplan itself was cut and constructed to slot into and around the walls, with long, thin, triangular strips of balsa attached underneath to support it and hold it level on the constructed 'hill'. 


View of internal supports

The floor separated from the walls


The floor was cut precisely to fit around the walls


Half-way through adding windows
The Glass planes were made out of tracing paper, as they were strong enough to bend and support themselves, and it was possible to draw the separate window panes on them without making the glass seem heavy. 
By cutting incisions into the floor, I was able to slot them in, and apply a small amount of glue for added strenght. This step needed refined glue work as any glue on the tracing paper would cause it to lose its translucency.  


The water I chose to represent with the same material as the windows, because in the real building, the glass and water were (for me) viewed for their same transparent and reflective features. To insert the tracing paper, I first measured the size of the pool, and then added on a short 'flap' to each edge. The outline of the pool was scored, to bend the flaps down which were then glued to constructed edges on the underside of the model. This can be seen in the photo earlier of the internal supports.


The choice in representing the grass and trees more realistically came from the idea that they would bring out the clean woodwork of the pavilion. As I discovered however, it did the opposite, and the scale of the trees had to be precise, even if they are just a representation of the vegetation. A large amount of the context was included to draw attention to the fact that this is a public building, accessible from both sides. 


Being my first major model, I feel I've learnt from it, and hope to take this to my next model.

Tuesday 19 July 2011

Model-It! Week 1 Class Exercise

Building from a base


The first given task for our first module was to construct a house with a set floor plan (scale 1:1). The elevations were left to our own creativity, with the exception that the model must be made out of balsa.

First task: Playing with idea proportions


I chose to explore the relationship between a perfect 'base width / height' by designing one elevation with the square part the same length as the base, and the other [shorter] end to have the full height of the elevation to fit the width of the base. The result wasn't as expected, with a distorted roof unachievable with balsa wood, that forced me to shorten one end in order to accommodate.


The results around the class from this short exercise displayed the variety of buildings achievable with the same initial base:

Same base, unlimited possibilities

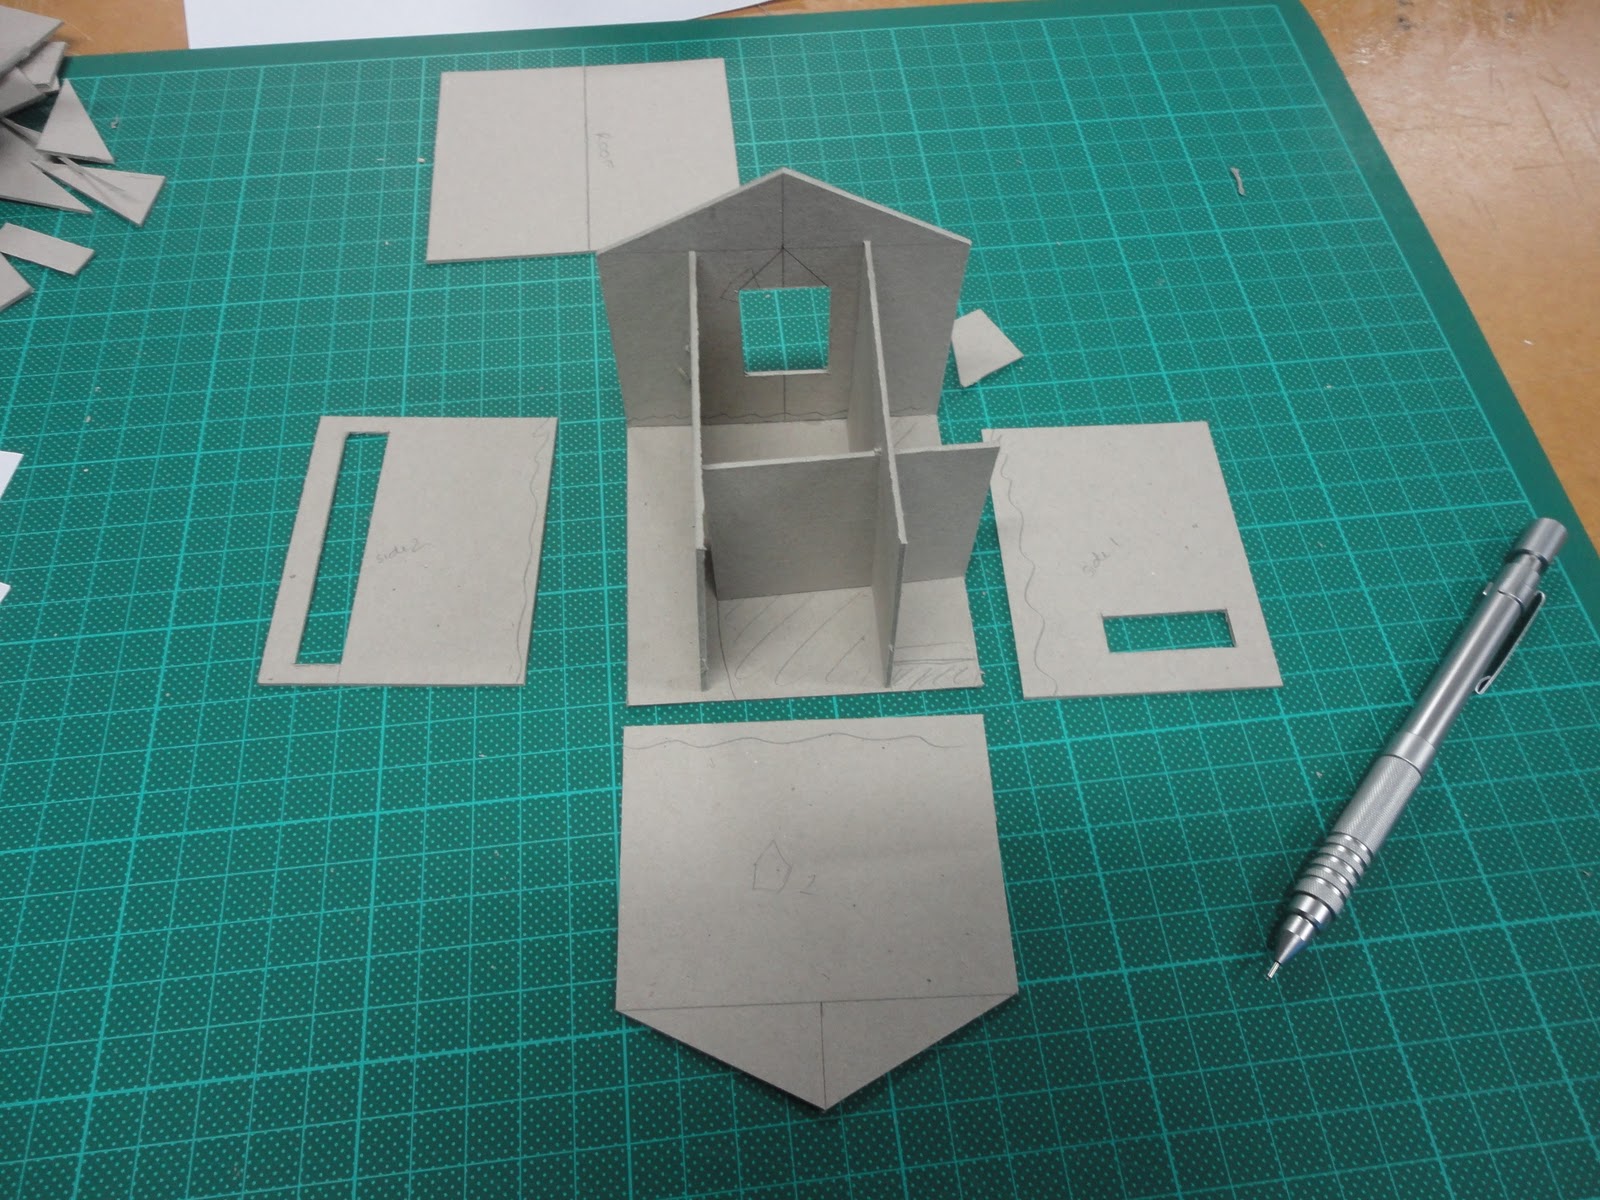
A similar task was given for the second task for this days task, with the changes of boxboard in place of balsa, and the requirement that the building must contain at least three windows.
The challenge of this task was to consider the internal structure of your model- what will be seen, how internal supports will be hidden, whether or not there will be anything of interest to see through the window.
To tackle this, I created a series of screens or rooms- some that would be seen and the hidden ones containing any wall supports. 

One way of controlling what can be seen through a window
Of note is the way my UHU glue reacted with cardboard as oppose to balsa wood: extra care was needed on cardboard as it discoloured. To address this I applied glue to the inner edge of a wall, so that if it spilled over, it would do so internally and not spoil the external neatness.

The final task was to then join our two houses together (which hurt to break one of them, but taught us not to be too attached to our work).
In retrospect, I am disappointed in the lack of creativity when joining my models. What I took from this task however was an appreciation of the fragility of balsa (from seeing other models break when cut) and an understanding that the weight of the material is important, because my top house ended up unbalancing my new joint model.

The final product of our week 1 Model-It! class task